MongoDB and Its Key Features
Introduction
MongoDB is a document-based NoSQL database system. Unlike relational database systems, MongoDB stores data using JSON-like documents. These documents consist of field-value pairs and are stored in BSON (Binary JSON) format.
Now, we will look at MongoDB, the star of the NoSQL World, in a detailed way. Also, we will learn MongoDB Atlas, MongoDB Compass, and MongoDB Shell. These are 3 important components in the MongoDB ecosystem.
First, download and install the suitable MongoDB version for your computer from the link. Don’t forget to check the Install MongoDB Compass option when installing.
1. MongoDB Atlas
It is a cloud-based service of MongoDB. Thanks to this service, you can host, manage, and scale your MongoDB database in the cloud. Atlas offers a range of features, such as high security, automatic backup, and fast and elastic scaling. It also provides the possibility to choose between various cloud providers (AWS, Azure, Google Cloud).
First, create a free account from MongoDB Atlas. After authorization and server selection, create a database and download a sample dataset from the Collection section. After doing these operations, the final image of the atlas will be as follows: (Look at the image for terminological expressions mentioned above.)
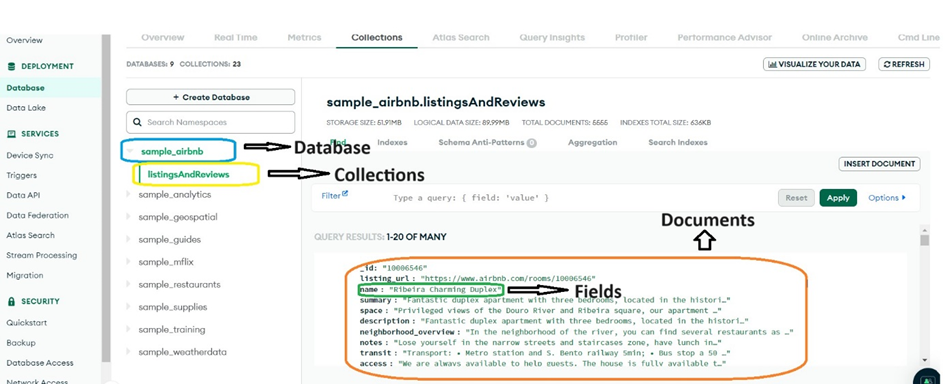
If you want to make any query in MongoDB Atlas, use the query bar. Come to the Database and Collection you want to query. Then, write the criteria you want in JSON format. Therefore, a result will appear.
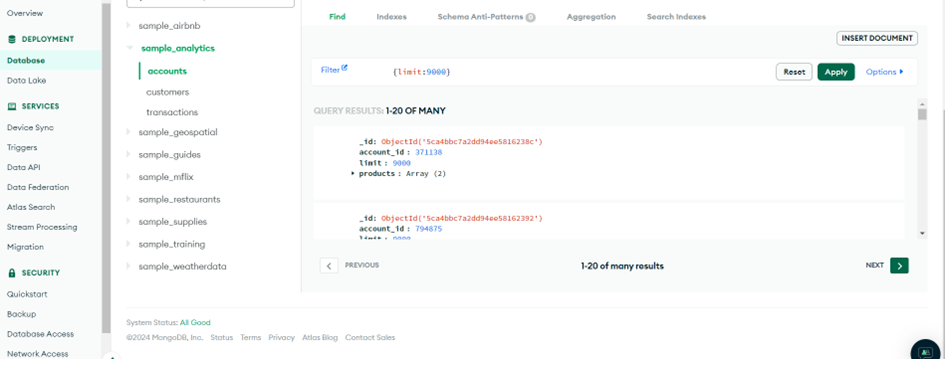
What about viewing the documents with a limit of 9000 in the accounts collection of the sample_analytics database?
It will be enough to type {limit:9000} in the query bar and click the Apply button.
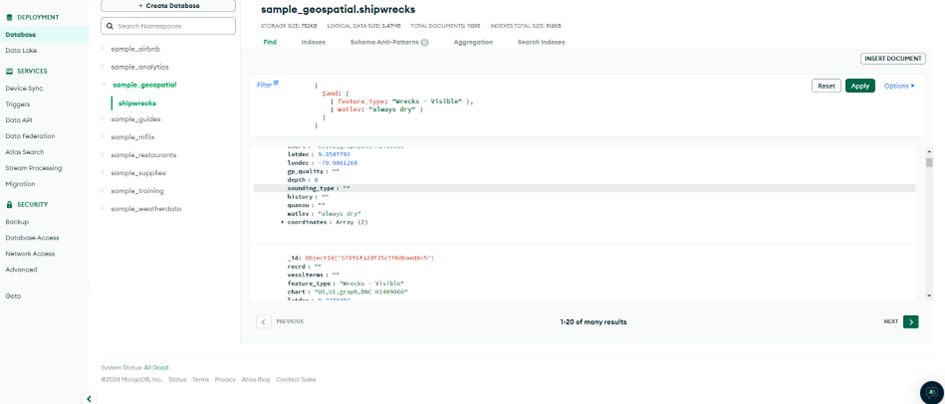
Now, here is another query that is a bit more advanced.
It is time to display the documents with feature_type value “Wrecks – Visible” and watlev “always dry” in the shipwrecks collections of the sample_gespatial database.
{$and:[{feature_type:”Wrecks – Visible”}, {watlev:”always dry”}]}
How to make queries in MongoDB Compass? We need to perform a series of operations to use the dataset we have uploaded to MongoDB Atlas in MongoDB Compass. Please follow the instructions in the images below.
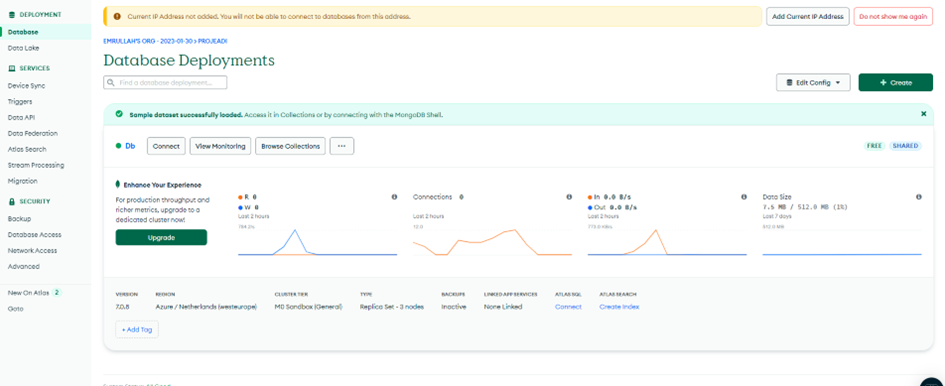
When you are on this screen, please click Connect. If you have not registered a database user or IP address on this screen before, you should first make these records. Also, you can make these records via the Database Access and Network Access icons on the left side of the screen. Then the following screen will appear.
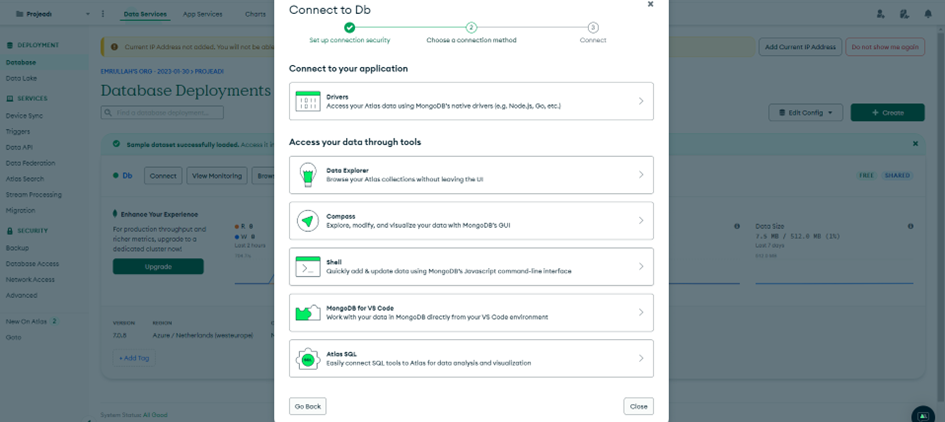
On this screen, click on the Compass icon.
We said at the beginning of the article that you should also install MongoDB Compass when installing MongoDB on your computer. However, if you don’t install it, you can install it by clicking “I don’t have MongoDB Compass installed” and following the instructions there. After completing the installation process, you should come to this screen again. We continue as if you set it up.
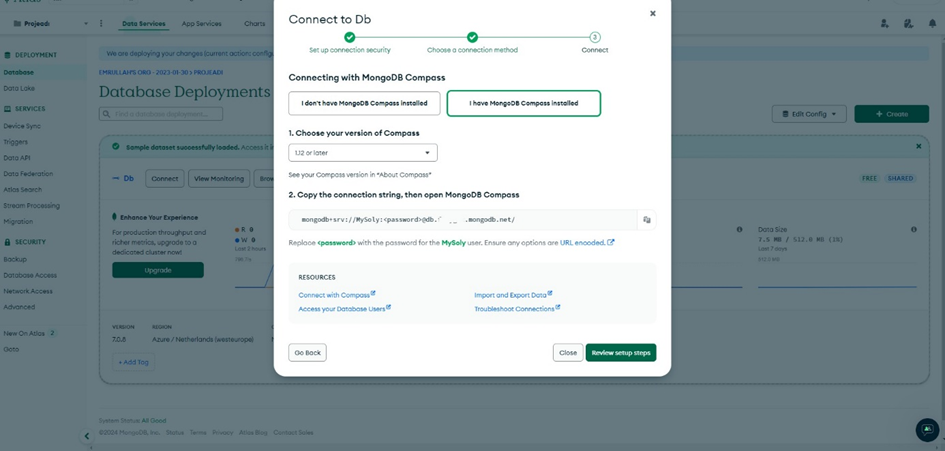
On this screen, select “I have MongoDB Compass installed”. Select your MongoDB Compass version (1.12 or later or 1.11 or earlier). Then, copy the string under the “2. Copy the connection string, then open the MongoDB Compass” option and click the Review setup steps icon.
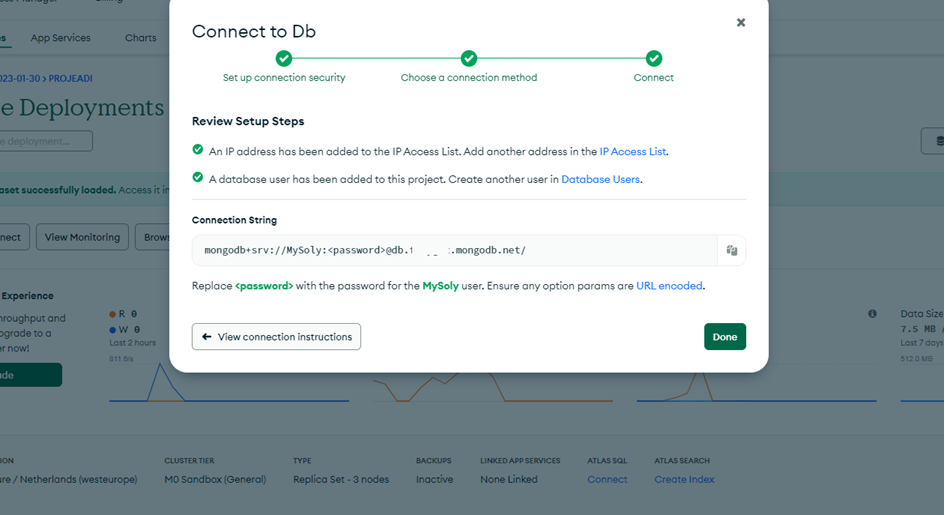
In the Connection string on this screen, which we have just copied, “MySoly” represents our database username, and Password represents our created password. You can close it by clicking the done icon. Then log in to the MongoDB Compass application. Now, we will define MongoDB Compass shortly. Then we will move on from where we left off.
2. MongoDB Compass
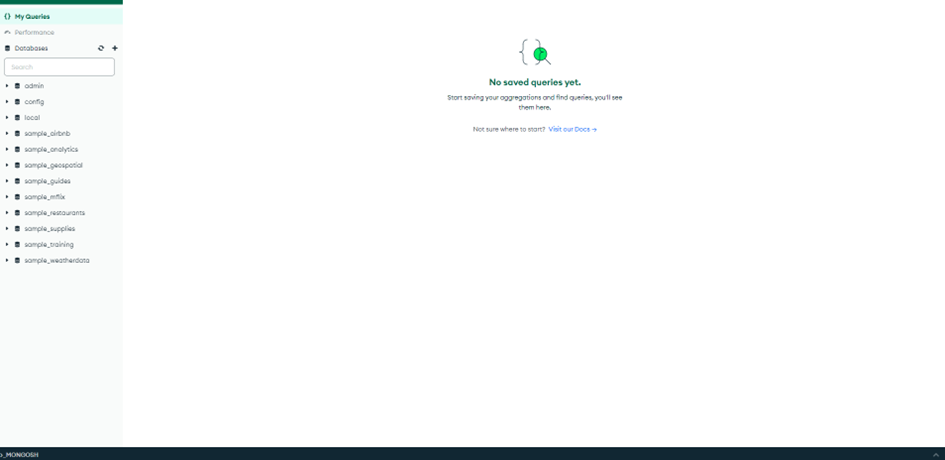
It is a visual user interface of MongoDB. This tool facilitates database management and querying. Compass allows you to visually explore your database, and create queries. Also, it helps visually analyze data and run certain structured queries. After logging into the MongoDB Compass App, you will see a screen like the one below.
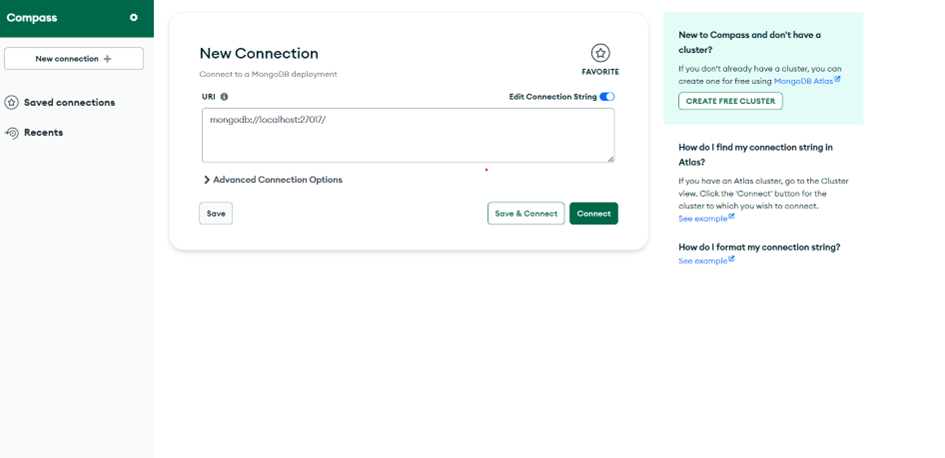
You will see a screen like this. You can view the dataset you uploaded to the MongoDB Atlas in your desktop application with MongoDB Compass. Now, it is time to make a few examples. Here, we can make queries in the query bar, just like in the MongoDB Atlas.
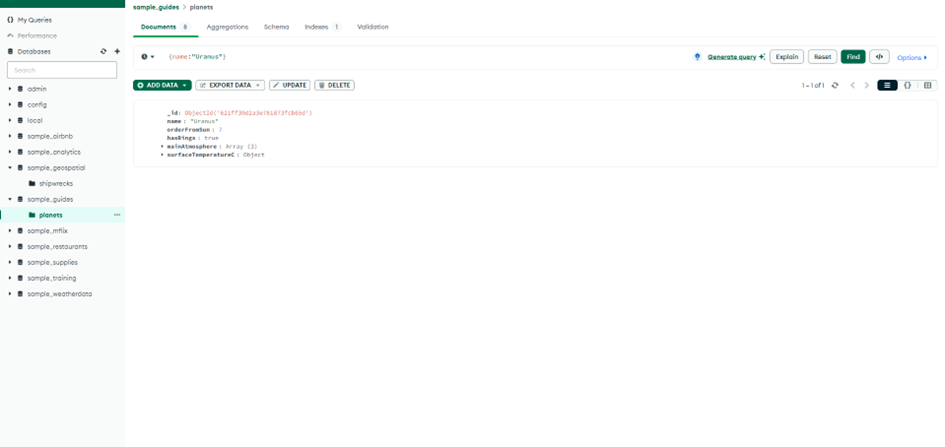
For example; we can view the documents with the name Uranus in the planets collection of the sample_guides database.
{name:”Uranus”}
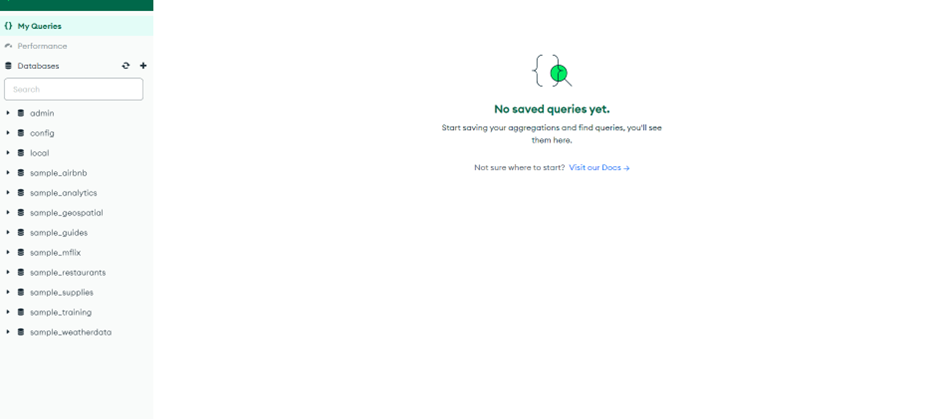
You will see a screen like this. You can view the dataset you uploaded to the MongoDB Atlas in your desktop application with MongoDB Compass. Now, it is time to make a few examples. Here, we can make queries in the query bar, just like in the MongoDB Atlas.
For example; we can view the documents with the name Uranus in the planets collection of the sample_guides database.
{name:”Uranus”}
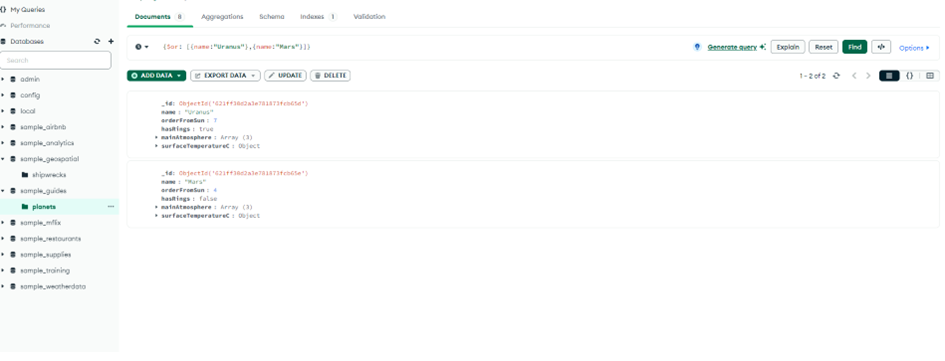
Now let’s bring the ones with the name Uranus or Mars into the same collection.
{$or: [{name:”Uranus”},{name:”Mars”}]}
Now, we will have a brief introduction of MongoDB Shell. Then, we continue with detailed examples.
3. MongoDB Shell
MongoDB is a command line tool. This tool allows you to interact with the MongoDB database. It helps you connect to the database, run queries, and insert, update, and delete data. Shell also supports developers to programmatically automate database operations. You can access the MongoDB Shell terminal by clicking on the black bar at the bottom of the MongoDB Compass application.
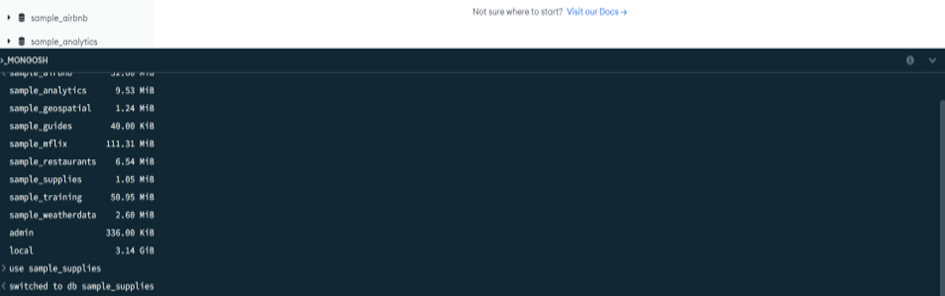
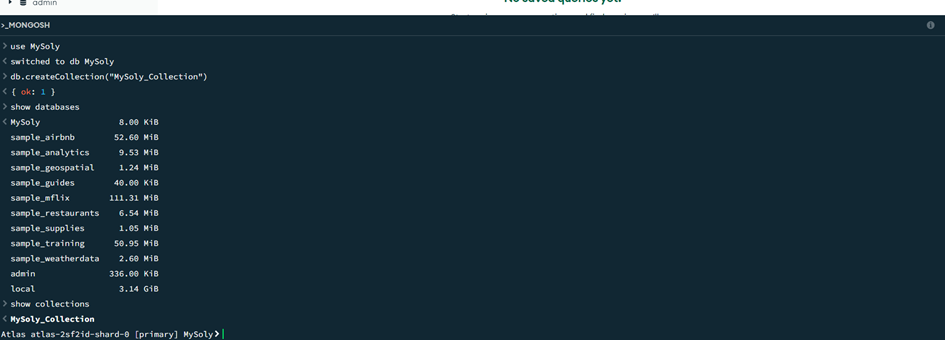
When you type show databases in the terminal, you can view your databases.

You can connect to the database you want with Use database_name. We will now connect to sample_supplies.
use sample_supplies
With the show collections command, you can view the collections in the database.
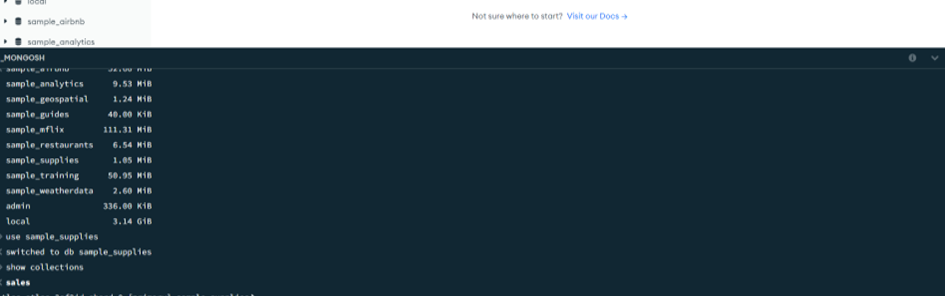
As you can see, the only collection in this database is the sales collection.
Now create a database and collection. First, you need to create a database. You can do this with the use database_name command. We will create a database named MySoly by running the use MySoly command. Then we run db.createCollection(“MySoly_Collection”) command. Here, db represents our database named MySoly. Next, when we run the show databases command, our database is created and our collection is created with the show collections command.
We can also view this database in MongoDB Atlas and MongoDB Compass. But first, take a look at how the query commands are written. When querying in MongoDB Shell, db always represents our database. db should be followed by the collection name and query method. Here are the basic query methods below.
db.<collection_name>.find(): Finds documents in a specific collection.
db.<collection_name>.insertOne(): Inserts one document.
db.<collection_name>.find(): Finds one or more documents.
db.<collection_name>.insertOne(): Inserts a new document.
db.<collection_name>.updateOne(): Updates a field of a document.
db.<collection_name>.deleteOne(): Deletes a document.
db.<collection_name>.createIndex(): Creates an index in a collection.
db.createUser(): Creates a new user.
db.dropDatabase(): Deletes a database.
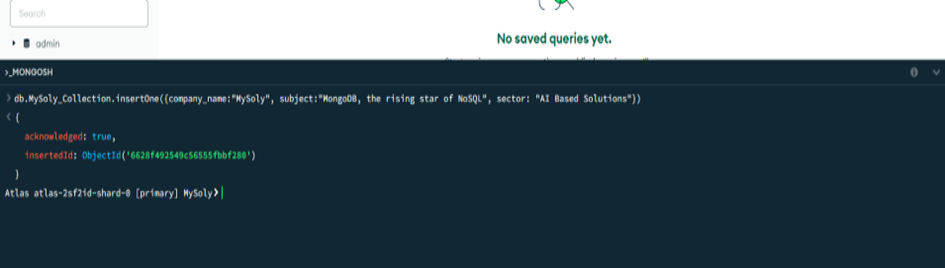
It is time to use a few of the basic commands above. First, add a document to the newly created collection. For this, use the insertOne or insertMany method. Then, run the following command.
db.MySoly_Collection.insertOne({company_name:”MySoly”, subject:”MongoDB, the rising star of NoSQL”, sector: “AI Based Solutions”})
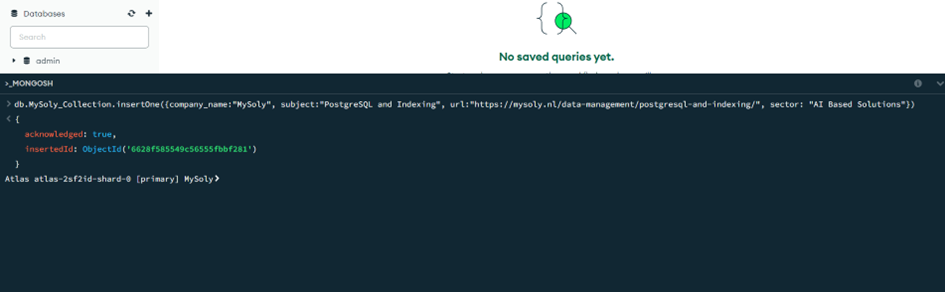
Let’s create another record.
db.MySoly_Collection.insertOne({company_name:”MySoly”, subject:”PostgreSQL and Indexing”, url:”https://mysoly.nl/data-management/postgresql-and-indexing/”, sector: “AI Based Solutions”})
View these two documents we added from MongoDB Atlas and MongoDB Compass.
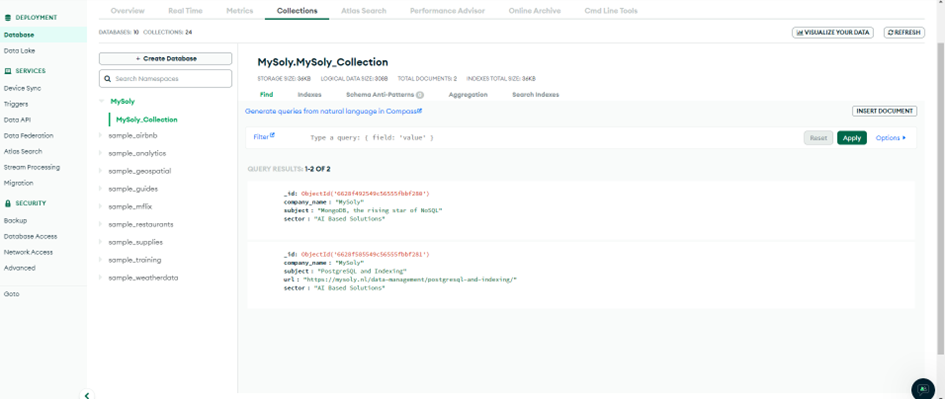
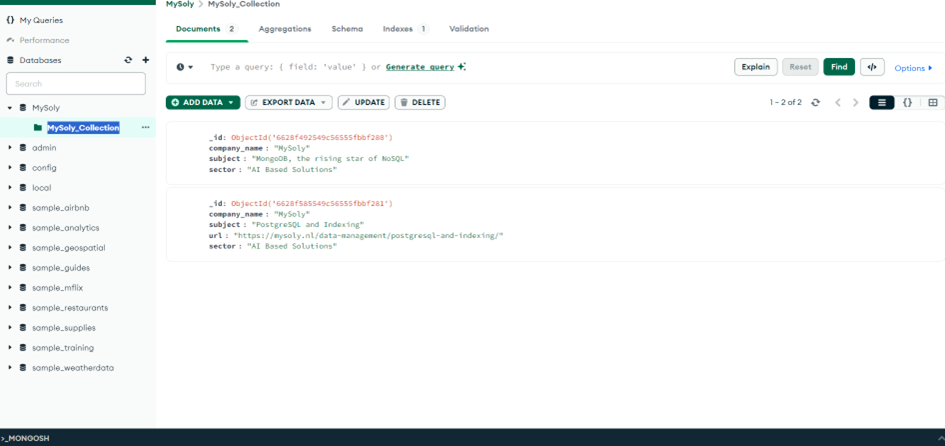
Here are the database, collection, and documents we added. They can also be viewed in other components of MongoDB. These two documents show that NoSQL is a more flexible language than SQL. As we mentioned above, SQL tables are rigid. However, in NoSQL, there can be differences between both documents.
Conclusion
We examined three important tools that MongoDB offers: MongoDB Atlas, Compass, and Shell. MongoDB Atlas simplifies installation and administration by providing a cloud-hosted MongoDB service, while Compass facilitates database design and querying with a GUI (Graphical User Interface). MongoDB Shell provides access to the MongoDB database with a command line interface and offers flexible query writing. Using the Shell, you can perform basic operations such as creating a database, adding, updating, deleting, and querying data. In this way, you can make your application development processes more efficient by using the powerful and flexible structure of MongoDB.